Introduction
The Mnist hand written digit database is one of the most famous dataset in machine learning.Although they are maintained in several well known library, as it seems that there are several ways to utilize them and several type of datasets, I confused whether there are something difference.
Because I guess there are anyone like me, I wrote this article to maintain confused information.
Because I already wrote this article in Japanese and referred some reference in that, in this article I'm suppose to show reference in minimum.
Assumption
I assume that you already installed sklearn, tensorflow and pytorch.(Anyway as for me I installed them with Anaconda.)Furthermore I use MacOSX
Notation
We can see two types of mnist so called hand written dataset.The first is the one attached to sklearn.
And the second is the others.
The first one is made up of 8×8 pixels.
And the second is 28×28 pixels.
The data attached to sklearn (8×8pixel)
where they are
The dataset attached to sklearn is in the following directory./(depending on environment respectively)/lib/python3.7/site-packages/sklearn/datasetsThe follow is in my case. (I use Anaconda)
$ls  /Users/hiroshi/opt/anaconda3/lib/python3.7/site-packages/sklearn/

__check_build   dummy.py   model_selection
__init__.py   ensemble   multiclass.py
__pycache__   exceptions.py   multioutput.py
_build_utils   experimental   naive_bayes.py
_config.py   externals   neighbors
_distributor_init.py  feature_extraction  neural_network
_isotonic.cpython-37m-darwin.so feature_selection  pipeline.py
base.py    gaussian_process  preprocessing
calibration.py   impute    random_projection.py
cluster    inspection   semi_supervised
compose    isotonic.py   setup.py
conftest.py   kernel_approximation.py  svm
covariance   kernel_ridge.py   tests
cross_decomposition  linear_model   tree
datasets   manifold   utils
decomposition   metrics
discriminant_analysis.py mixture
And looking the inside the dataset directory, you might find as follows.
$ls /Users/hiroshi/opt/anaconda3/lib/python3.7/site-packages/sklearn/datasets

__init__.py     california_housing.py
__pycache__     covtype.py
_base.py     data
_california_housing.py    descr
_covtype.py     images
_kddcup99.py     kddcup99.py
_lfw.py      lfw.py
_olivetti_faces.py    olivetti_faces.py
_openml.py     openml.py
_rcv1.py     rcv1.py
_samples_generator.py    samples_generator.py
_species_distributions.py   setup.py
_svmlight_format_fast.cpython-37m-darwin.so species_distributions.py
_svmlight_format_io.py    svmlight_format.py
_twenty_newsgroups.py    tests
base.py      twenty_newsgroups.py
Here you can see the other datasets beside mnist.
And diving into the dataset directory more deeply, you might find as follows.
$ ls /Users/hiroshi/opt/anaconda3/lib/python3.7/site-packages/sklearn/datasets/data
boston_house_prices.csv  diabetes_target.csv.gz  linnerud_exercise.csv
breast_cancer.csv  digits.csv.gz   linnerud_physiological.csv
diabetes_data.csv.gz  iris.csv   wine_data.csv
Here there is some datasets like iris dataset , boston_house_price dataset and so on that are often referred some article about skelearn.
How to import dataset
It is same to official page of sklearn.The subsequent task is done launching the python from terminal.
>>> from sklearn.datasets import load_digits
>>> import matplotlib.pyplot as plt
>>> digit=load_digits()
>>> digit.data.shape
(1797, 64)

>>> plt.gray()
>>> digit.images[0]
array([[ 0.,  0.,  5., 13.,  9.,  1.,  0.,  0.],
       [ 0.,  0., 13., 15., 10., 15.,  5.,  0.],
       [ 0.,  3., 15.,  2.,  0., 11.,  8.,  0.],
       [ 0.,  4., 12.,  0.,  0.,  8.,  8.,  0.],
       [ 0.,  5.,  8.,  0.,  0.,  9.,  8.,  0.],
       [ 0.,  4., 11.,  0.,  1., 12.,  7.,  0.],
       [ 0.,  2., 14.,  5., 10., 12.,  0.,  0.],
       [ 0.,  0.,  6., 13., 10.,  0.,  0.,  0.]])
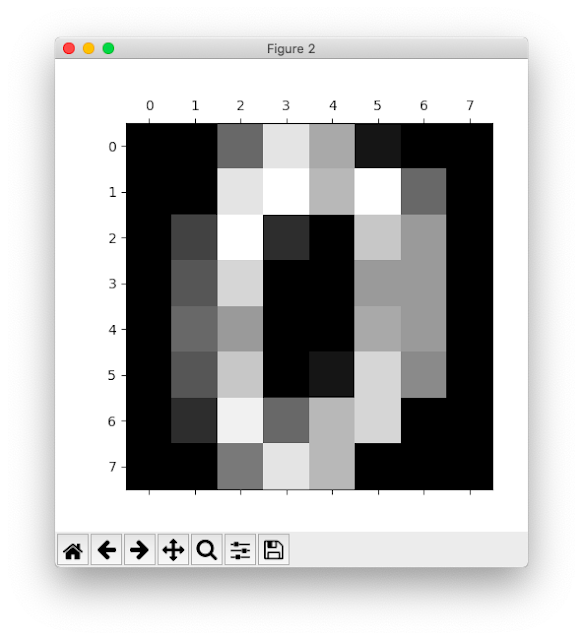
>>> plt.matshow(digit.images[0])
>>> plt.show()
And the following image will appear.
Download the original dataset(28×28pixel)
The original dataset of mnist is in this page.But the data you can get there is binary data which you cannot use it as it is.
So you need to process them to utilize.
But as you will see , the mnist dataset is so famous dataset that there are a lot of tools to use them immediately.
Of course , although the way to process them by yourself exit, as I couldn't catch up with it and I thought I wondered whether we took much time to seek the way, I'm not suppose to talk about the way.
Download via sklearn(28×28pixel)
Searching internet, in some old article I could find the following way.from sklearn.datasets import fetch_mldataBut it shows us error , as the website we are suppose to access is not available.
So nowadays it seem that we have to use fetch_openml as follows.
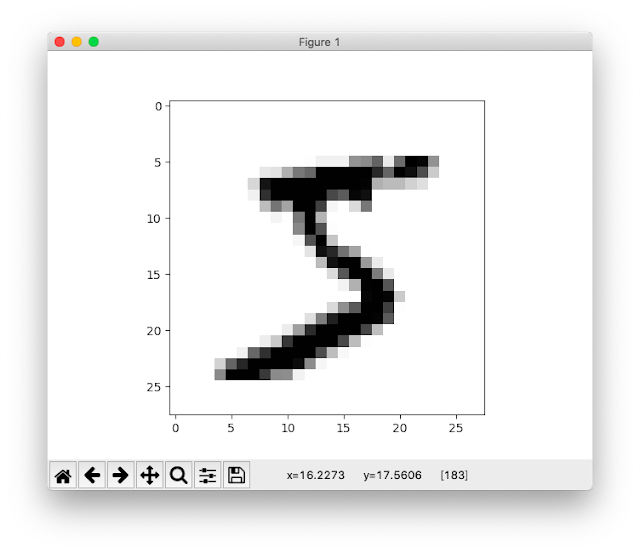
>>> import matplotlib.pyplot as plt >>> from sklearn.datasets import fetch_openml >>> digits = fetch_openml(name='mnist_784', version=1) >>> digits.data.shape (70000, 784) >>> plt.imshow(digits.data[0].reshape(28,28), cmap=plt.cm.gray_r)>>>>>> plt.show()

tensorflow(28×28pixel)
This is the way using the tutorials of tensorflow.>>> from tensorflow.examples.tutorials.mnist import input_dataAlthough this command might enable us to import mnist, it didn't. In my case I faced the following error.
As a result There may be some case where the directory including the tutorial isn't downloaded with tensorflow.
Traceback (most recent call last): File "I tried to check inside of directory practically.This is the result.", line 1, in ModuleNotFoundError: No module named 'tensorflow.examples.tutorials'
$ls /Users/hiroshi/opt/anaconda3/lib/python3.7/site-packages/tensorflow_core/examples/
__init__.py __pycache__ saved_model
I referred the following pages
- ModuleNotFoundError: No module named 'tensorflow.examples' (Stackoverflow)
- Github page of Tensorflow

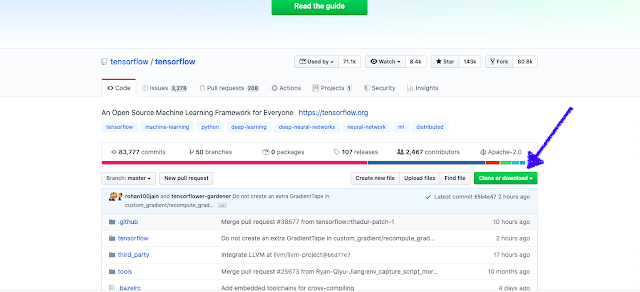
we can find the directory named "tensorflow-master", and in the directory named tensorflow-master\tensorflow\examples\ , there is a directory named "tutorials".
we copy the directory ,"tutorials" into "/Users/hiroshi/opt/anaconda3/lib/python3.7/site-packages/tensorflow_core/examples/"
Then,
>>> import matplotlib.pyplot as plt
>>> from tensorflow.examples.tutorials.mnist import input_data
>>> mnist = input_data.read_data_sets("MNIST_data", one_hot=True)
>>> im = mnist.train.images[1]
>>> im = im.reshape(-1, 28)
>>> plt.imshow(im)

>>> plt.show()
and you can find the image of mnist.
keras(28×28pixel)
>>> import matplotlib.pyplot as plt >>> import tensorflow as tf >>> mnist = tf.keras.datasets.mnist >>> mnist >>> mnist_data = mnist.load_data() Downloading data from https://storage.googleapis.com/tensorflow/tf-keras-datasets/mnist.npz 11493376/11490434 [==============================] - 1s 0us/step >>> type(mnist_data[0])I'm not suppose to show image I got, but if you are in success in doing procedure , you must find the image.>>> len(mnist_data[0]) 2 >>> len(mnist_data[0][0]) 60000 >>> len(mnist_data[0][0][1]) 28 >>> mnist_data[0][0][1].shape (28, 28) >>> plt.imshow(mnist_data[0][0][1],cmap=plt.cm.gray_r) >>> plt.show()
pytorch(28×28pixel)
It seems that if you can't run the following command you can't go next.>>> from torchvision.datasets import MNISTI faced an error.
It seems that torchvision don't exit.
In my case, when installing pytorch , I merely do as follows. It seems to be the reason.
$conda install pytorchIn order to install some options, you have to do as follows.
$conda install pytorch torchvision -c pytorchAs you are required to choose y or n, you choose y.
Doing it ( if you need),you run the following command.
>>> import matplotlib.pyplot as plt


>>> import torchvision.transforms as transforms
>>> from torch.utils.data import DataLoader
>>> from torchvision.datasets import MNIST
>>> mnist_data = MNIST('~/tmp/mnist', train=True, download=True, transform=transforms.ToTensor())
>>> data_loader = DataLoader(mnist_data,batch_size=4,shuffle=False)
>>> data_iter = iter(data_loader)
>>> images, labels = data_iter.next()
>>> npimg = images[0].numpy()
>>> npimg = npimg.reshape((28, 28))
>>> plt.imshow(npimg, cmap='gray')

>>plt.show()
The sources I referred
The original dataset of mnist
- MNIST handwritten digit database, Yann LeCun, Corinna Cortes and Chris Burges
→The original data of mnist exit in this page. Tha data you can get there is binary data.
sklearn
Tensorflow
- ModuleNotFoundError: No module named 'tensorflow.examples' (Stackoverflow)
- Github page of tensorflow
0 件のコメント:
コメントを投稿